How To Shoot Close-Up and Macro Photography With Your iPhone
About Jack Hollingsworth
Jack Hollingsworth, a denizen of Austin, TX, is an award-winning, 30-year career veteran in commercial photography. Jack has fallen in love with his iPhone camera as his primary capture tool. He is also an avid Camera+ devotee and has been since day one. He deeply believes that, when all is said and done, the iPhone may just be remembered as the most influential capture device ever in the history of photography.
Today’s blog post and video is about how to shoot close-up and macro photography.
Defining the Terms
I know to many of you reading this post that it might sound like I’m splitting hairs but I always like to differentiate between these terms:
Close-Up Photography
I like to think of close-up photography as getting as close as you can (with your iPhone camera) to the subject you are shooting without using any special 3rd party lens attachments or special shooting apps.
Macro Photography
On the other hand, macro photography is when the size of the photograph (projected on the sensor via the lens) is equal to or greater than the actual subject, like in these illustrations:
1.0 defining the terms
How Close Can You Get With the iPhone Camera?
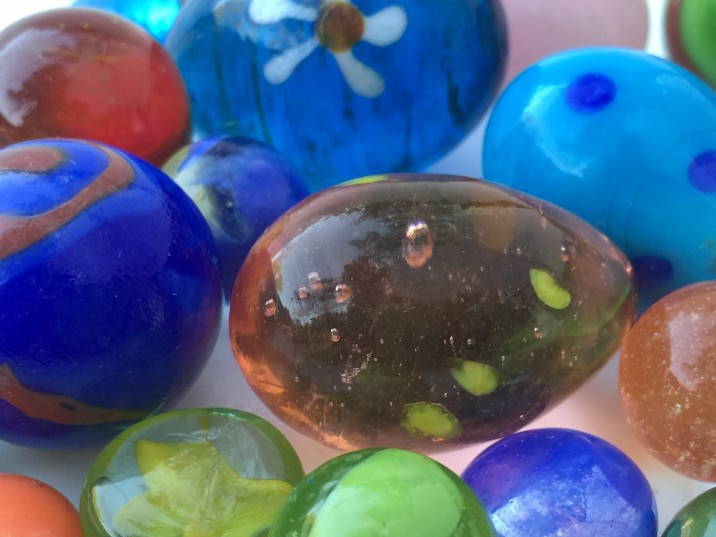
For the most part, depending on what model iPhone you own, the magic distance for holding focus is roughly 3-4 inches (from subject to lens). This is surprisingly close for many subjects that have enough detail to be interesting to shoot…like flowers, coins, feathers, yarn, crystals, stuff in your junk drawer, etc.
Here is a gallery of flowers I shot without doing anything special other than getting about 3-4 inches away. So simple and so beautiful:
2.0 how close can you get
Focus is Critical in Macro
You have heard me say many times here that focus is a critical part of the photographic process. This is especially true in macro. The closer you get, the more careful and critical your focusing skills become. In macro photography, if you miss your focus point, even slightly, it could very well mean the difference between being a master or a disaster. Because focus plays such a huge part in the close-up and macro experience, my suggestion is to manually focus. In other words, take the camera off auto focus. Manual focus gives you so much more ‘fine tuning’ control than you would get if you shot the same subject in auto mode.
Camera+ has, without a doubt, the best and most intuitive manual focus control wheel. Hats off to the team at tap tap tap!
3 Focus is Critical in Macro (Option)
Macro Shooting Mode in Camera+ 6
You are going to absolutely love the new ‘macro shooting mode’ that is part of the new Camera+ 6 launch. It is a simple ‘one touch’ activation on the control bar. Once you’re in the ‘macro shooting mode’ you will be close to your subject, and I mean REAL close. Look at this gallery of reptiles and insects I shot using Camera+ 6 – all in macro shooting mode. If 3-4” just isn’t close enough…then have fun and treat yourself to some macro magic!
4.0 macro shooting mode
Exposing for Macro
As a general photography rule, the closer you get to your subject, the more light your camera is going to need to properly expose for that same subject. While auto exposure does a pretty decent job, I prefer to shoot in ‘manual exposure’. Additionally, I like to slightly ‘overexpose’ and make my close-up and macro photography a bit brighter. This way I can control my exposure points. Having the ability to ‘overexpose’ or ‘underexpose’ (called exposure compensation) is so easy to do in the new Camera+ 6. You simply swipe the wheel to darken or lighten – so easy and so intuitive!

We talk a lot on this blog about how exposure is a personal choice. There is no ‘perfect’ exposure. It’s a matter of taste. But when it comes to macro and shooting at high magnification (from 2x to 21x), you generally are going to need some added light so don’t be hesitant to overexpose.
Background is So Important
One of my very favorite accessories for shooting close-up and macro photography is fromModahaus. They have a wide range of tabletop products – all designed for smartphones, tablets and phablets. I especially like the clear, white backdrops and stands because it makes the color in close-up and macro really pop.

Taking Your Macro to the Next Level
Okay, let’s talk about getting really close – macro close. You want to take this to the next level. So what do you do? Simple – you buy a 3rd party attachment lens that allows you to get crazy close. One of my favorites is the Olloclip 3 in 1. What I especially love about it is that it gives you 3 lenses in one package – 7x, 14x, and 21x.

Like I mentioned earlier, holding strict focus points at high magnifications is a challenge. If you don’t mind the ‘edge fall off’ or ‘pincushion focus’ effect, then these attachment lenses will be fun for you to explore the world of macro.
Accessories for the Mobile Macro Photographer
Here are some tried and true accessories for your very own macro kit:

Manfrotto Pixi Mini Tabletop Tripod
This Italian made tabletop tripod is a real beauty.
(Note: I always use a tripod when shooting tabletop close-up and macro)

MeFoto Tripod and Sidekick 360
This MeFoto tripod is a staple in my location kit. I never leave home without it…period – macro or otherwise. The Sidekick 360 is what I use to attach my iPhone to the MeFoto tripod. It’s fantastic!

Avoiding touching the camera at all will minimize movement and blur – use a remote trigger.

Did you know that you could use the EarPods that come with your iPhone as a remote trigger? Now you do!

The Fun is in the Details
As I alluded to earlier, we, as photographers, are not naturally trained to get close to our subjects, but with a little practice, you’ll be a close-up and macro pro in no time at all.
Spend a day shooting everything at 3-4”. Get used to seeing subjects close-up. Then maybe play around with the new Camera+ 6 macro shooting mode for an even closer look. After that, if want to get closer even still, try your hand at a 3rd party attachment lens and see the world really magnified.
Once you catch the close-up and macro bug, you’ll be hooked for a lifetime. It’s all about the details. It is a small word after all!
9.0 fun is in the details
Featured Posts
-
 Camera+ 10 arrives with full depth support, HEIF, accurate viewfinder and smiles!
by Pedro Cuenca
-
 A Beginners Guide for Manual Controls in iPhone Photography: ISO
by Jack Hollingsworth
-
 A Beginners Guide for Manual Controls in iPhone Photography: Shutter Speed
by Jack Hollingsworth
-
 A Beginner’s Guide for Manual Controls in iPhone Photography: Exposure
by Jack Hollingsworth


