Adventures in iPhone photography from the creators of… Camera + MagiCam Filters

A Beginner’s Guide for Manual Controls in iPhone Photography: Exposure

October 24, 2014 by 68 Comments

About Jack Hollingsworth

Jack Hollingsworth, a denizen of Austin, TX, is an award-winning, 30-year career veteran in commercial photography. Jack has fallen in love with his iPhone camera as his primary capture tool. He is also an avid Camera+ devotee and has been since day one. He deeply believes that, when all is said and done, the iPhone may just be remembered as the most influential capture device ever in the history of photography.


Welcome to the second feature in our series of Beginners Guides for Manual Controls in iPhone Photography. You can find the other installments here:

  1. Focus
  2. Exposure (this post)
  3. White Balance
  4. Shutter Speed
  5. ISO

It’s not at all surprising that many beginning mobile photographers get intimidated and overwhelmed by all the dials, buttons and menu settings you see in so many camera apps today. It’s altogether too easy to ignore this rudimentary ‘tech talk’ and shoot only in auto mode where the camera is making all mechanical and technical decisions about exposure focus and white balance – not you.

Take courage! Understanding and applying basic manual controls to your mobile photography will quickly elevate your game.

I have spent the better part of my photography career in manual mode. In fact, I never used anything ‘auto’ until I began shooting with the iPhone camera. That was primarily because, at the time, I had to, as there were no manual controls available for the iPhone.

I can tell you this (and with some certainty) – learning and applying manual controls to your exposure, focus and white balance will single-handedly do more for your iPhone photography than buying any number of apps. Learn the fundamentals. Learn the ‘ins and outs’ of manual control and find out just what is possible.

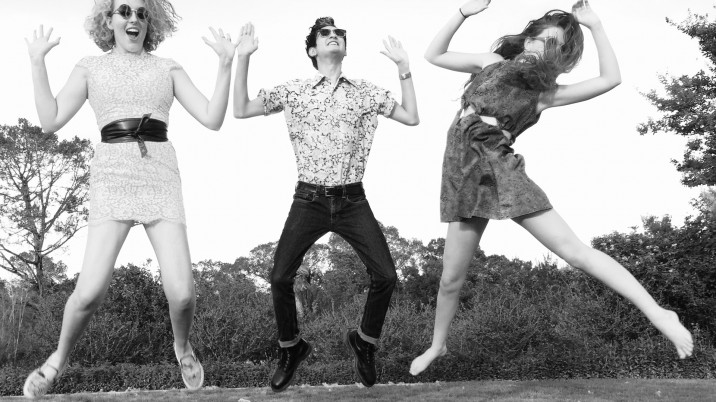
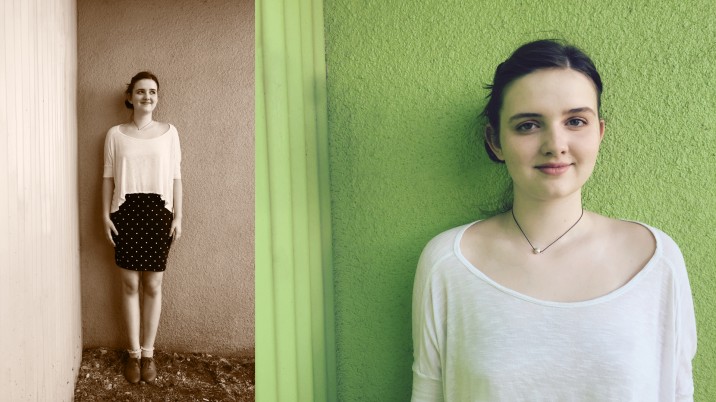
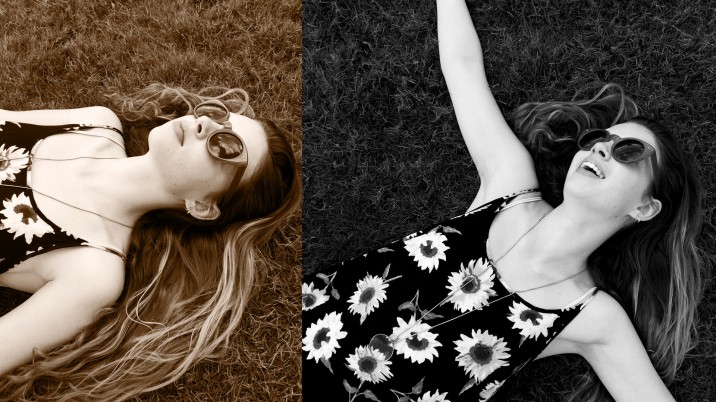
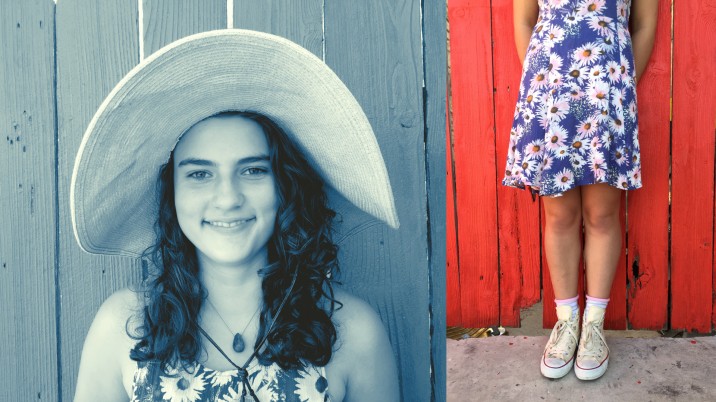
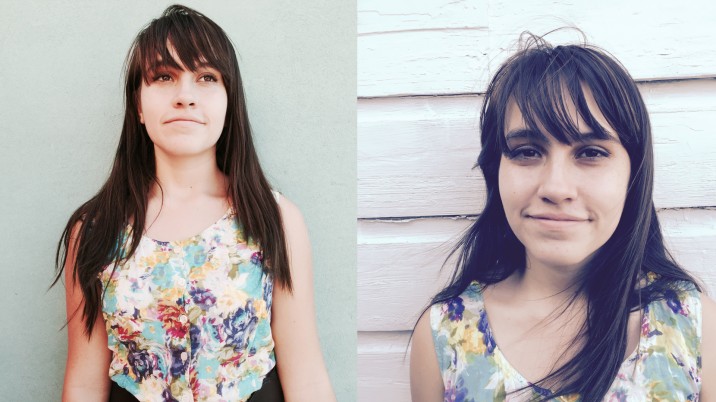
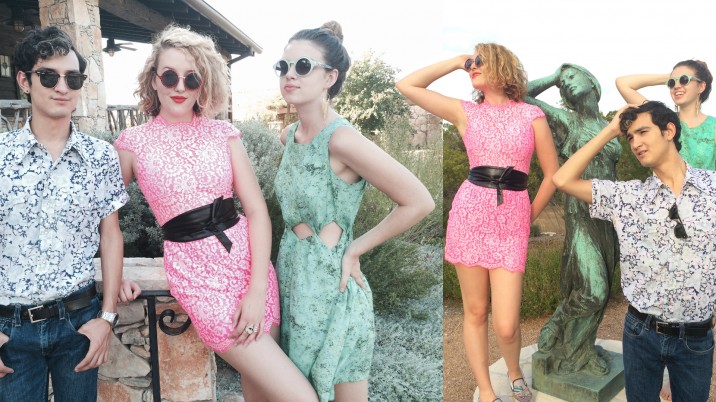
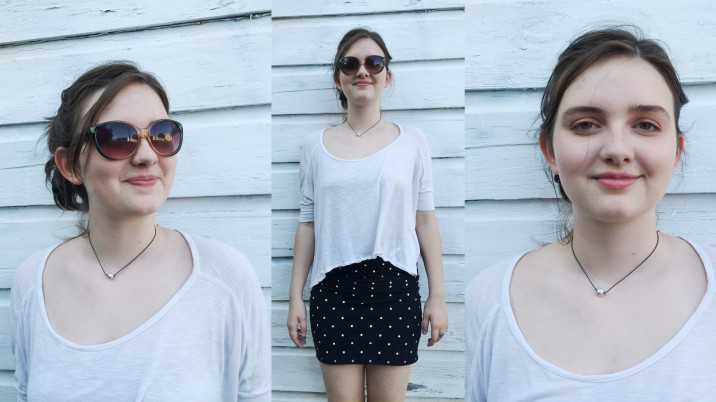
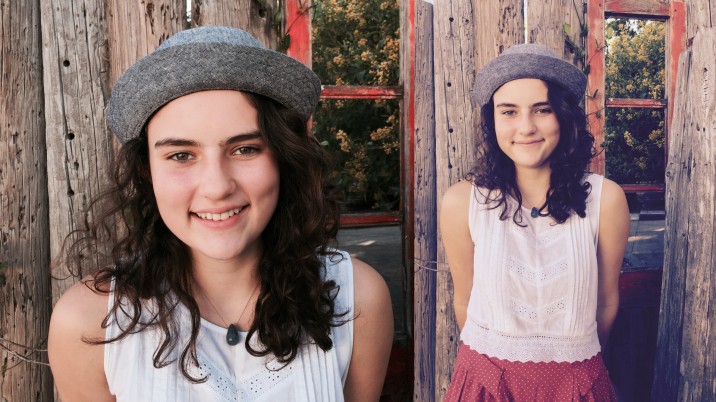
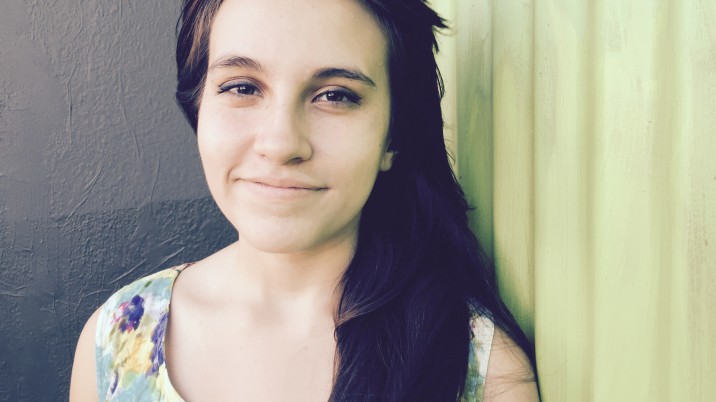
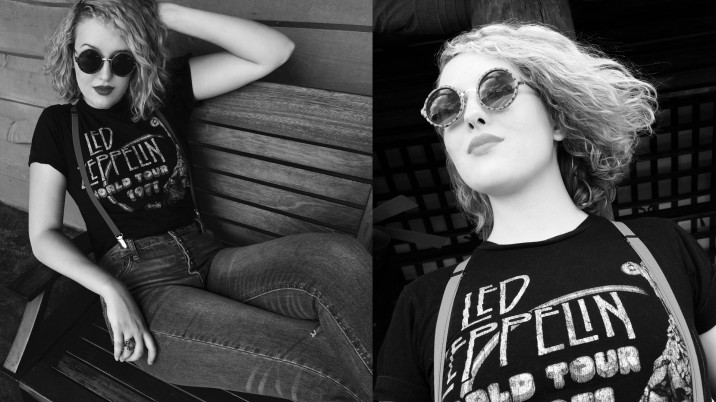
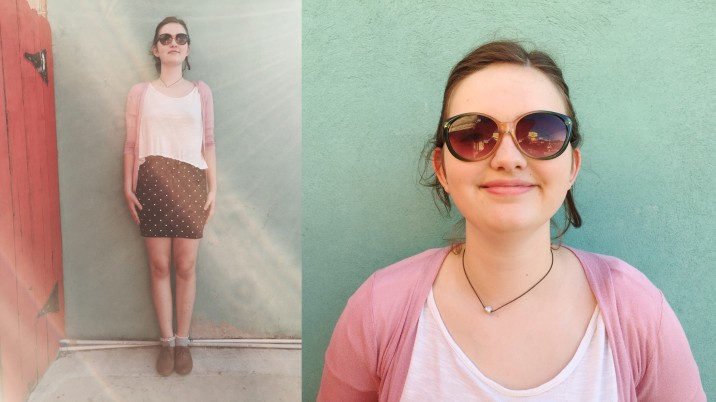
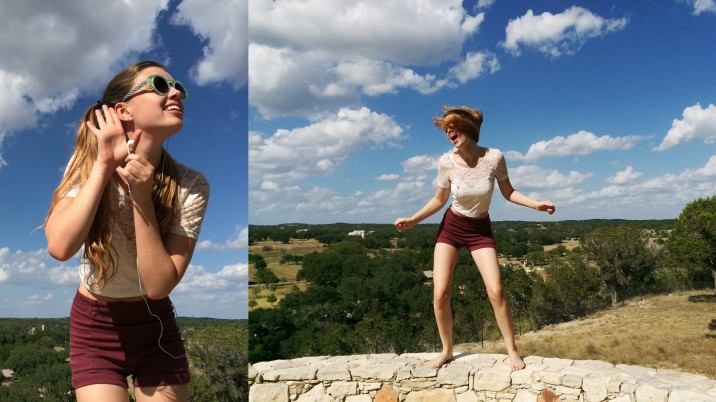
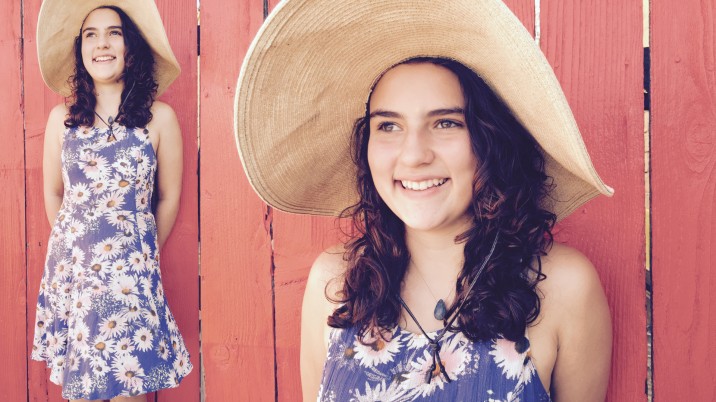
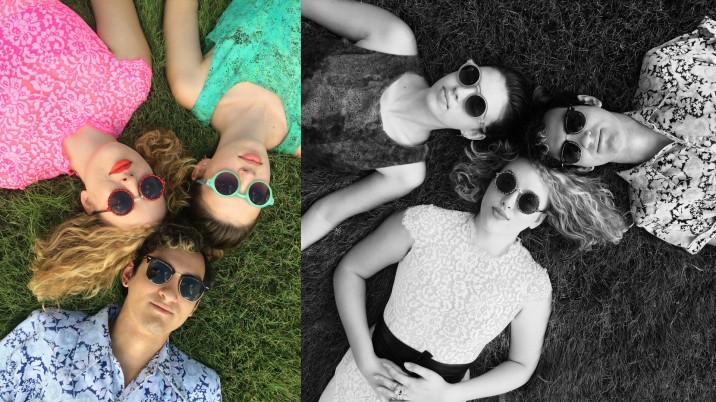
I will also add here that simply shooting in manual mode will not automatically make you a better photographer. It should (at the very least) increase the likelihood that your mobile photographs will take on a new and unique mood and style. Take a look at this gallery of images. In particular take a look at how I exposed these images (capturing details in the full range of the photo from the brightest to the darkest parts of the photo). Don’t they collectively feel more refined? Don’t they look more like DSLR shots than iPhone shots?

0.0 opening

What Is Exposure?

Exposure in simple terms is the process of letting light through the camera lens and illuminating or exposing the digital sensor. This exposure process is the fundamental element in all photography and it’s been that way from the very beginning – light through the lens onto the sensor.

How Exposure Works

Matter of Taste

Technically speaking (at least as I see it), there is really no such thing as a ‘perfect exposure’. What is perfect for some might not be perfect for others. Exposure is a matter of taste. I prefer to use the term ‘optimum exposure’ where there is sufficient detail in the full range – from the brightest to the darkest part of the photo. The range of light in a photo is often described in terms of highlights, shadows, and midtones. The brightest part of the photo isn’t necessarily the lightest colored, but where the most light is. Conversely, the shadows are not the darkest colored, but where there’s the least light. Midtones, are everything in between.

Optimum Exposure

Finding a Happy Medium

In photographic terms, when the camera sensor doesn’t receive enough light, the resulting image is dark and it is described as underexposed. When the camera sensor receives too much light the resulting image is light and described as overexposed. The key is to find a ‘happy medium’ exposure that specifically suits your photographic style, taste and expectations.

3.0 finding a happy medium

The photo below is one that I would say perfectly reflects ‘optimum exposure’. The photo is neither overly light or overly dark. It just feels right. There is plenty of detail in both the brighter and the darker parts of the photograph. When a photo is said to have ‘optimum exposure’ it means that the photographer has found the best settings for aperture, shutter speed and ISO (automatically or manually), thus creating a pleasing balance of the full range of the photos detail.

Optimum Exposure

Exposure Triangle: 3 Factors That Affect Exposure

Every single exposure you ever take is equally affected by three controlling factors – aperture, shutter speed, and ISO. These factors, graphically laid out, are often referred to as the ‘exposure triangle’:

Optimum Exposure

APERTURE
Aperture is the hole or opening (technically called an ‘iris’) in the camera lens. ‘Aperture’ refers to the intensity of light. It is measured in ‘f-stops’. The ‘f-stop’ scale looks like this (in 1/3 stops):

F-Stop Scale

A smaller ‘f-stop’ means a larger aperture, while a larger ‘f-stop’ means a smaller aperture. For example, f2.2 is a larger aperture then f22:

Aperture Settings

It’s important to keep in mind here that the iPhone 6 camera has a fixed f2.2 lens, and that never changes. Its overall effect on the exposure triangle is somewhat minimal. What is important to know here (and is slightly ironic) is that because of the small size of the iPhone lens relative to the small iPhone sensor, f2.2 is really like shooting at f22 (if you were shooting in bright light).

SHUTTER SPEED
If the aperture refers to the ‘intensity of light’ reaching the camera sensor, then the shutter speed refers to the ‘duration of light’ hitting that same sensor. On the iPhone 6 camera, shutter speeds look like this (in full stops and fractions of a second):

1/2s , 1/4s , 1/8s , 1/15s , 1/30s , 1/60s , 1/125s , 1/250s , 1/500s , 1/1000s

The slower shutter speeds (such as 1/2 sec., 1/4 sec., 1/8 sec., 1/15 sec.) BLUR movement. Higher shutter speeds (such as 1/250 sec., 1/500 sec., 1/1000 sec.) FREEZE movement.

In auto mode, the iPhone camera normally picks a low ISO and a higher shutter speed combination. You have to switch to ‘manual exposure’ mode to get access to controlling the shutter speed and/or the ISO.
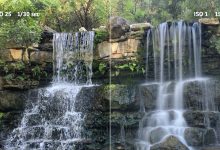
ISO
ISO refers to the overall sensitivity of the sensor to light. On the iPhone 6 camera, the ISO range is from ISO 32 (low) to ISO 1600 (high). Low ISO generally means ‘low noise’, but a darker picture, while high ISO generally means ‘high noise’ and a brighter picture. There will be a time, when shooting with your iPhone, that you need ‘more light’ to make the image brighter. Because the aperture is fixed at f2.2, the only 2 controls you have to make the image brighter is to manually adjust either the shutter speed and/or the ISO.

I like to conveniently group my ISO ranges into four categories:

ISO Chart

With Camera+ 6 in manual mode, you can easily control both your shutter speed and ISO. It may take a while to get the complete hang of it (and it’s also likely that you’ll want to use it often) but when you do, for those special photographs that require unique exposures, you’re going to be so happy that you are using a photo app that gives you an independent control of each.

Determining Exposure

You can determine exposure either automatically or manually. In automatic mode, the camera selects the best combination of shutter speed and ISO to give you an ‘optimum’ exposure. Auto exposure works brilliantly in most bright light situations, but it struggles a bit and is not as accurate in low light situations. In Camera+ 6, you have two options for manual exposure control: You have shutter priority mode – where you pick the shutter speed and the camera automatically adjusts the ISO, or, you can opt for full manual control – where you have complete and total control over both shutter speed and ISO.

Exposure Compensation Wheel

For those of you not quite ready to begin using either shutter priority mode or full manual mode, you still have the luxury of using the ‘exposure compensation wheel’:

Exposure Compensation Wheel

This exposure compensation wheel allows you to adjust your exposure bias (or exposure compensation) ‘lightening’ or ‘darkening’ your shot with just a swipe of the wheel.

Of all the new features inside Camera+ 6, this exposure compensation wheel is by far my runaway favorite feature. It’s simple, practical, intuitive and accurate. I can even use it in conjunction with auto focus to lighten or darken a photo to suit my style and taste.

Exposure Compensation Comparison

Exposure Value (EV)

Exposure value (EV) is a single number used to describe the many suitable and applicable exposure combinations of aperture, shutter speed and ISO. Each EV step is equal to one stop adjustment of the aperture, shutter speed and ISO. It is typically used when talking about exposure compensation and bracketing.

(+)1EV means increasing exposure by one full stop, thus lightening the image. Conversely, (-)1EV means decreasing exposure by one full stop, thus darkening the image.

Exposure Compensation Comparison

Locking Exposure

I spend most of my DSLR career ‘locking my exposure’ on a scene or subject, then shooting the entire scene in that ‘locked’ position. In this way, all my exposures from that scene have the same tonality.

8.0 locking exposure

Displaying Exposure

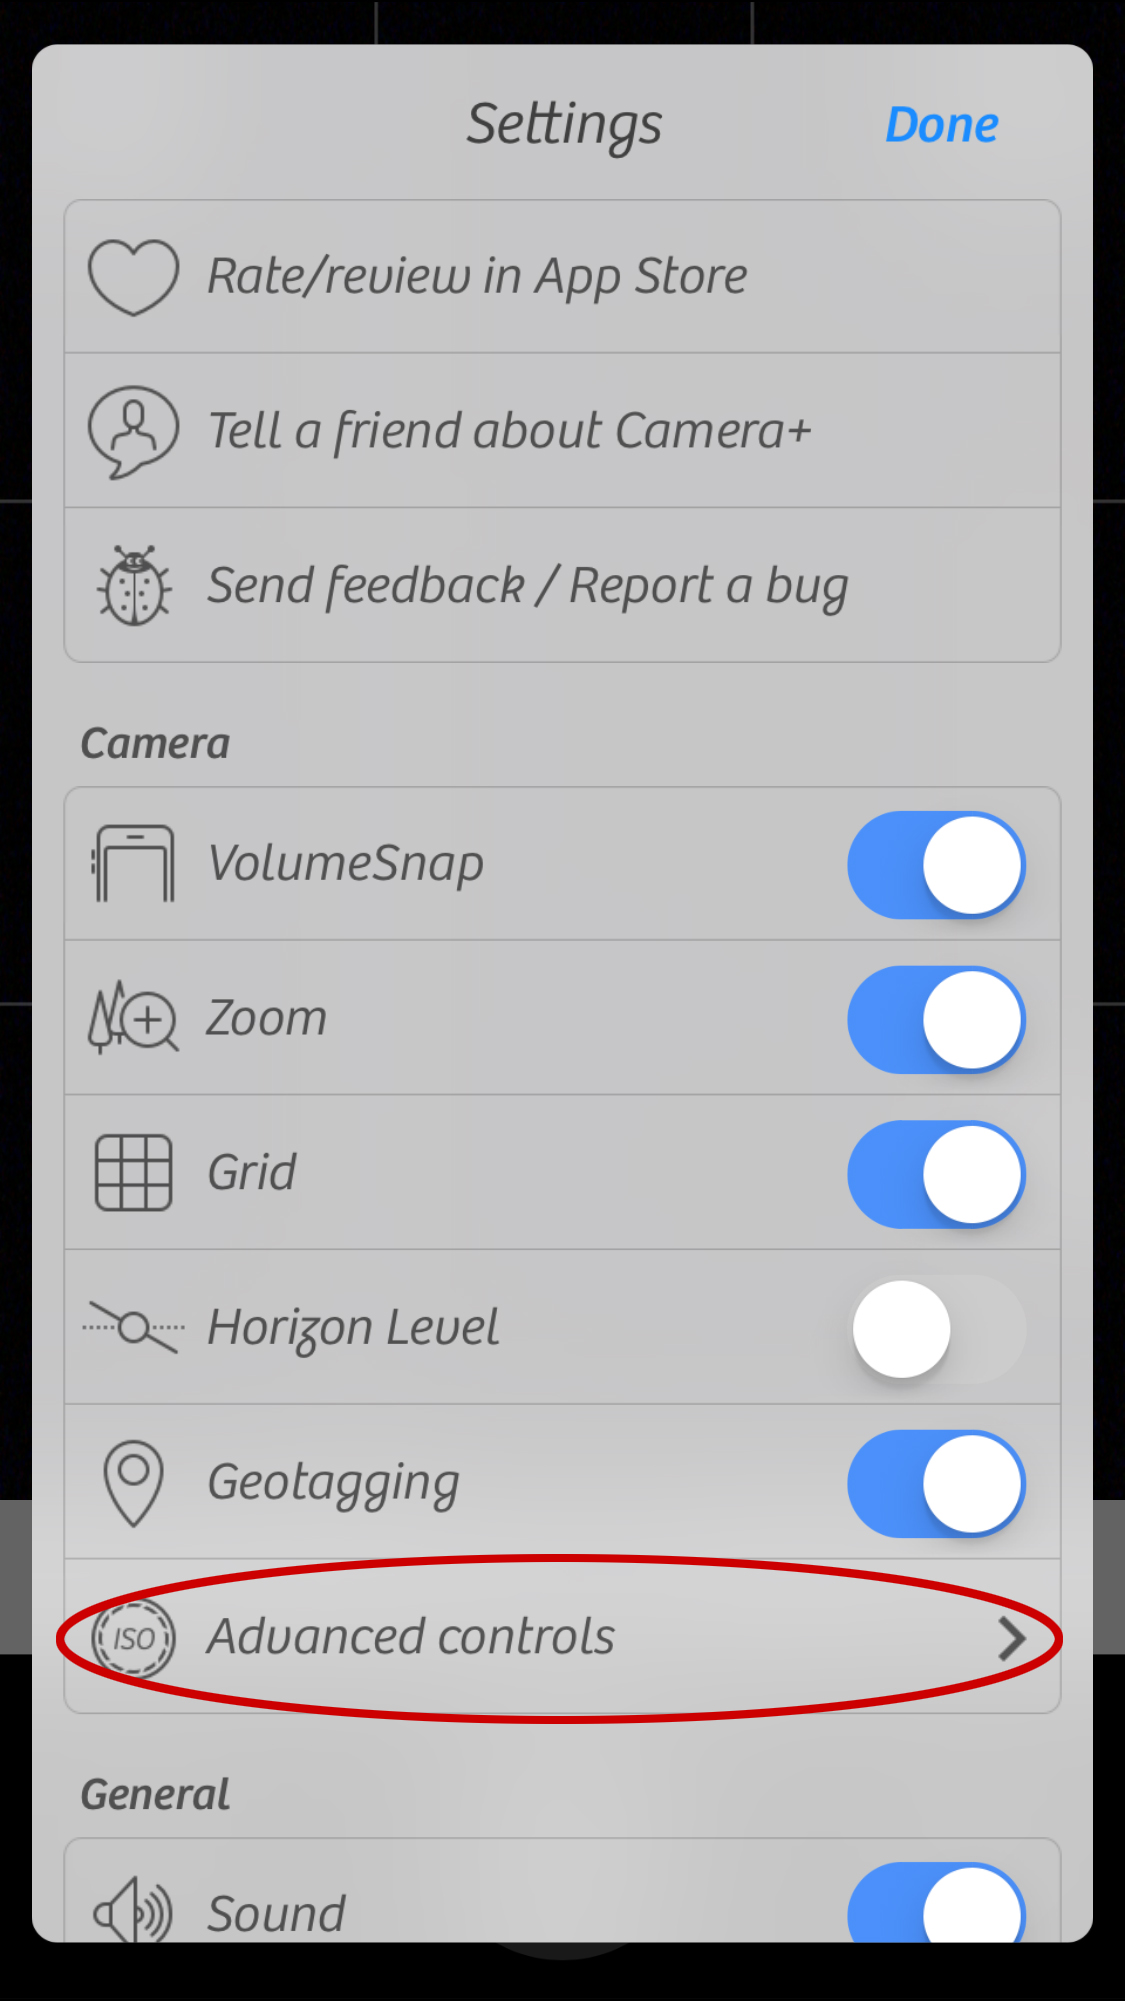
Whether I shoot in ‘auto’ or ‘manual’ mode, I always want the exposure, shutter speed and ISO data displayed in my viewfinder. In Camera+ 6 you simply go to the settings, look under ‘advanced controls’, then toggle on ‘live exposure’. Voilà! It’s really that simple.

Settings
Advanced Controls

Applying and Celebrating Exposure

You might be a quick learner and immediately and conceptually grasp the concept of exposure. That’s awesome. Good for you! But know this – ‘understanding’ and ‘applying the concept’ of exposure are two very different things. Understanding may be immediate but applying it will be a lifelong pursuit, and a very fulfilling one at that.

Even after all these years of shooting commercial photography with almost every camera known to man, I am still intrigued and infatuated by the photographic concept of exposure. The science of photography, over the years, hasn’t really changed that much. Optimum exposure has been and always will be a delicate combination of aperture, shutter speed and ISO. And while the technology hasn’t changed, the art of photography surely has. Learn how to express your art through exposure. Click away!


Download PDF 2.4 MB

Who Linked To This

68 Comments

  1. Great article very informative.can’t wait for the next videos learning a lot from this man thank you.

  2. I know you’ve got very few comments, but the fact is I didn’t know about this site at all. And I’ve learned so much from these videos. Please get Jack to do a whole lot more. In fact, it would be nice if he took just one element and really dug deep. It often feels like he’s got a whole amount to tell us, but then moves to another feature.

    Oh, and Jack, try not to bounce on your toes when speaking into the camera. It’s movement that isn’t helping.

  3. Another great article Jack. This is really useful, helpful and long awaited information. I love watching the videos and then reading the articles which helps me to digest the info, a really great format for learning. I’d love to see a follow up article, more in depth, of you putting all these manual controls in to practice explaining the reasons for your exposure choices. I also know that to make these videos are a lot more work than they seem so congratulations on a really brilliant educational iPhone photography series.

  4. An amazing article! Thank you so much! I’m going to dtart practising with both my iPhone6 & Canon dslr.

  5. Jack:
    This article, in addition to your excellent video on the subject, is greatly appreciated. I also follow Nicki Fitz-Gerald’s videos on iPhoneography and I am enlightened and encouraged by both of you. Thanks and keep up the good work.

  6. To whom it concerns,
    Scrolled through this page because of the nice diagram of “The Exposure Triangle,” incuded in Section 4. I added the link to this whole page into a post on my blogspot. Hope whomever does not mind. Will immediately remove the link if there is a problem. My blog is what I am doing at the moment in my photographic endeavors to improve. Wanted to let you know the link to this blog was being used.
    Regards, and thanks for your post.

  7. Am I correct to state that exposure correction is the fine tuning of “normal” exposure or are those two not really related? Started wondering about this one this morning. What is the difference between exposure and EV? Forgive me if I am asking the obvious…

  8. how do you lock exposure with Camera+ ?? You state that you always do this, but I have found no way to do so. While I am at it, when i go to full manual mode, and chose the exposure round wheel, when I start to change values the wheel goes away. I am very confused but trying hard.

  9. Exposure is a general and somewhat subjective term, while EV, or exposure value, is a quantifiable value in stops of light. EV may be what my light meter says is the right combination of shutter speed and f-stop at a certain ISO. By pushing the + or – button on my camera (or flash), i can choose to raise or lower the EV by increments of 1/3 stops, half stops or full stops of light.

  10. Jack, as another old photographer who has been at it for 40 years, I appreciate the clarity and simplicity of presentation and value of information in this post. I will use this with the 150 members of my cyber charter school’s Student Photo Club, many of whom have and are shooting with iPhones.

  11. And another thing, I found the iPhone to be the perfect camera for street photography. I just did a gallery show with images shot on the iPhone during a summer rainstorm at an auction/flea market. I was either invisible or at least non-threatening to my subjects in a way I could never have been with a DSLR. And, the images held up well when enlarged as prints, some up to 24×30.

  12. iPhone has no shutter, a fixed aperture, single focal length, tiny ISO range, and lots of noise unless you’re shooting in broad daylight.

    That’s two of the three corners of your triangle are gone. Oh, shutter and ISO are one and the same on iPhones and nearly all other cellphone cameras. The imager is instructed to capture light for a specified period, that’s it. Sort of similar to a shutter, but not really, because the duration is also varied to compensate for the “ISO” setting.

    These charts and pictures of apertures, shutter speed, triangles, DoF and such are very misleading. Decent optics for a wide-angle lens… it is a prime, after all.

    Cellphones are almost pinhole cameras, except some have a focusing mechanism. Not much comparable to modern cameras, otherwise.

  13. Good article. My Camera Plus app only goes down to 1/4 second, however. Is there a way to open the shutter longer?

  14. I am new iPhone 6s+. I am use to a Canon EOS 7D. I am use to manual and shooting raw. One would think using the iPhone would be easy. Not sure why but it is harder for me than my regular camera. I got it because I needed a way to make contact and thought i would also explore the camera side of it. It is light and easy to carry.

    I purchased a few camera apps to try them out. One of them, CP PRO, which I thought was camera plus pro. I thought it was camera Plus 6 with the addition of good macro capabilities. Is that correct? How do I find the controls? Do I have to be connected to the internet to access the controls? I am not finding the EV controls. Is this the little thing that looks like shutter icon? Any tips on focus especially movement. I am not sure I am getting the focus right. Maybe I am trying to hard.

    I also purchased 645 Pro, VSCO, and Kinomatic. I have probably only had these for a couple of weeks. I was also running into some difficulties with the iPhone not responding well to touch. Hard to know what is inexperience, possibly related to an app or maybe the phone. I am around people with iPhone experience and they were having difficulty getting the screen to respond quickly and easily. It does not do that all of the time.

    I want to explore this just need a little help learning how to access the controls.

    Aslo I guess the volume button on the iPhone 6s+ can snap a photo. How do I disallow that? I am clumsy and keep hitting it when I do not want to.

    Thanks for any help you can provide.

    Terri

  15. I teach photography and your illustration and explainations are just exceptional. I want to incorporate some of these into my class, with full attributation. Thank you for your contributation to photography education. (I teach at a non-profit institute at Florida State University.

  16. This is heavy on concept, scant on how-to. Tip #2 is bracket your exposures — trial and error!

    The author brags about the “refined” look of his photos, but they’re not taken in direct sunlight. Low contrast scenes are a cinch. Grab your EV and play with it. Nothing will blow out.

    He didn’t touch on basics like your camera trying to damp down a bright sky because it expects to place it on the mid tones when you’re perfectly satisfied with it being nearly white, etc: i.e. Your meter expects an even balance of light and darks. Point it at snow, it will underexpose. Try a night street, it will boost the darks to mids. A backlit subject will be dark because the sensor is overwhelmed by light flooding from behind, which you’re perfectly happy to have nearly blown out as a delicate halo around your subject.

    Camera+ Simply needs a histogram, period. My ten year old point and shoot has one. Until the app gets HDR capabilities, a histogram would be the best exposure guide. Spot metering would be better if you could actually tell the camera where to place the brightness values it’s sensing.

  17. Todo aquel que en el creyere, no sera avergonzado. Romanos 10: 8-11 La diversidad nos separa porque cada iglesia cree tener la absoluta verdad, pero la realidad es que solo hay una ”verdad” y esa verdad es Jesucristo, que dijo: Yo soy el camino, la verdad y la vida, y nadie ira al Padre sini es por mi. En el analisis final, solo habra una sola iglesia, y esos son aquellos que han sido lavados por la sangre de Cristo, y han lavados sus ropas, y las han emblanquecido en la sangre del Cordero. Apocalipsis 7:14

  18. For Luis V, if I correctly understand what you wrote f2.2 IS larger than f22. The aperture (opening that allows in light) is very small at f22 and quite large at f2.2. It may seem counter-intuitive, but the larger the numerical designation, the smaller the opening allowing light to pass through.
    Or, were you asking about how to correct for the fact that an iPhone has a fixed aperture and cannot be changed? If that is the question, as the author points out, you are left with two manual controls: the shutter speed, and the ISO (ISO roughly equating to the old ASA designation for “film speed,” or film sensitivity.
    So, to “correct” for the small fixed aperture setting, to let in more light on the exposure, you must increase the sensitivity on the ISO setting, or slow down the shutter speed.
    !!! Now, to my problem…
    How do I get the manual controls to come up on the camera? I’ve been shooting photographs on a single lens reflex for 50 years, so these concepts are second nature to me. The problem for me is the mechanics – I’m stumped trying to get the manual controls on the screen of my bloody iPhone! Talk about a humbling experience, LOL.

  19. This is very interesting, You are an excessively skilled blogger.

    I’ve joined your feed and stay up for in search of extra of your magnificent post.
    Also, I have shared your website in my social networks

  20. Hi there I am so excited I found your webpage, I really found you by mistake, while
    I was browsing on Digg for something else, Nonetheless
    I am here now and would just like to say cheers for a incredible post and a all round entertaining blog (I also love the
    theme/design), I don’t have time to go through it all at the moment but I have
    saved it and also included your RSS feeds, so when I have time I will be back to read
    much more, Please do keep up the excellent work.

  21. Hello Jack,

    This Site has been extremely informative, so thank you for making this information available.

    Do you have any information about shooting “Milky Way Galaxy” or long exposure star photos with an Iphone 7?

    Thank you

  22. Something I’ve noticed on both a 6s and the 11 Pro – I’m thinking it’s common to all small sensor videography, but would welcome confirmation, and am hoping for a workaround:

    Going from a low Average Picture Level to high, there’s a flooding of light into the sensor (I think) – basically, even with ISO and Shutter Speed locked, there’s a huge visible exposure shift. This is still present in the 6s, but far less pronounced, leading me to believe it’s common to how light enters the lens and hits a small sensor, with the increased dynamic range of the 11 making the shift more problematic. Would a ND filter (or UV, or CPL) soften or spread the way light hits the sensor?

    11 Pro – 32 iso, 1/24 shutter – https://youtu.be/T0ltkTF9QKE

  23. The new offers are provided to the clients if they want to get ready to bring out their feelings. You are definitely in the right place if you have decided to book the girl from our agency.

  24. Hot call girls present in Chandigarh are the great mood activators and can rejuvenate moods and taste by providing a different experience.

  25. You may now find the lady love of thousands in your local city. Now pick up your phone and call her to create your connection so you may have the ultimate dating experience in any reputable hotel with her highly sought-after company.

  26. point when a client books a call young lady with an office, the organization goes through a strategy where the client and the call young lady are shipped off the assistance.

  27. Great article! The Beginner’s Guide for Manual Controls in iPhone Photography: Exposure provides valuable insights for capturing stunning photos. I appreciate the step-by-step instructions and practical tips. By mastering exposure, I can enhance my photography skills. By the way, if anyone needs help with assignments, don’t hesitate to pay to do my assignment with trusted services like ChristineJhon.

  28. Transform your ideas into stunning visual experiences with our 3D animation design company. We specialize in creating immersive, lifelike animations that engage and impress, helping you tell your story or showcase your products like never before.

Leave a Reply

Your email address will not be published. Required fields are marked *