How To Shoot Better Foodie Photography With Your iPhone
About Jack Hollingsworth
Jack Hollingsworth, a denizen of Austin, TX, is an award-winning, 30-year career veteran in commercial photography. Jack has fallen in love with his iPhone camera as his primary capture tool. He is also an avid Camera+ devotee and has been since day one. He deeply believes that, when all is said and done, the iPhone may just be remembered as the most influential capture device ever in the history of photography.
Thanks to Instagram, everyone is a foodie photographer these days. In all my years of shooting, I have never seen interest in food photography so high. It’s literally off the charts! People are shooting and posting food pictures faster than we can digest them (pun intended!).
Let’s face it, most of the food photographs you see on Instagram are marginal at best. Food is a hard subject to shoot well. Here are a few basic foodie tips to help your photographs stand out and make your culinary creations ‘mini works of art’.
Camera Angle
By far, the two most popular camera angles for shooting food are front view and top view.
The front view is often referred to, in photographic lingo, as a ‘front 3/4 view’. This means your camera is roughly 45 degrees in front of the subject you’re shooting. This front view is predictably the most popular since it is how your food appears (to your eyes) as it sits in front of you.

The second most popular view is the top down view, often called ‘overview’ or ‘birds eye’. It is my favorite since it is the most graphic and, to me, the most visually appealing.

Stack It Up
I love stacking layers of food on top of each other. It’s fun, interesting and generally captivates the viewers interest. Stacking food elements also helps fill the frame.

Light
You have two options when it comes to lighting your food. You can use natural light (outdoors) or artificial light (indoors). Most of the time food looks more flattering and appealing in natural light.
Once you get past this decision, you have another one to make. Do you want ‘direct’ light or ‘indirect’ light? Direct light is where your light source is directly hitting your subject. Indirect light is where the light is being softly reflected, bounced or diffused back onto your subject. For the most part, when you’re shooting food, you want the light to be as indirect as possible.


Split Lighting
Split lighting can be a little tricky. This is where the light is ‘split’ between highlights and shadows. In other words, you have both in your photograph. When you find yourself in this situation, it’s always best to expose for your highlights. Lock your exposure reticle on the brightest part of the subject and not on the shadow.

Room Temperature
Here’s a tip that just might surprise you, and one that photographers and food stylists have known for decades – food looks and photographs more natural at room temperature. This is no problem if you are shooting indoors but if you’re shooting outdoors in a very hot or tropical environment, shoot fast.

Eye Level
When you’re shooting sandwiches, like we are here, then get down to ‘eye level’ or even ‘table level’. Rest your camera on the table so you can see what is inside the sandwich.

Mess It Up
Let’s face it, if you’re like me, eating is messy, and it’s the way it should be. Look closely at this blueberry muffin. I shot one frame all neat and perfect and then, for an alternate shot (my favorite) I messed it up. We are all attracted to imperfection. It suits us well as photographers and as human beings. Give yourself permission to mess up your composition. The more…the merrier.


Background is Important
I like to think of food photography as 80% content (the actual food) and 20% context (the setting, location, ambiance, etc.). While I’m a big fan of focusing on the food, whenever and wherever it is possible, I also like to show just a hint of environment. I even like to shoot the same plate of food in different settings and then decide, after the fact, which one I like best.


Don’t Get Too Close
Be careful and don’t get too close when you’re shooting food. Food isn’t the best subject for abstraction or macro. Back up and give the food plenty of breathing room. Also remember that with your iPhone camera, you are shooting with a built-in wide-angle lens. If you get too close to your food plate, the wide angle will exaggerate the photo and make it look anything but natural.

Styling Isn’t Just For Hipsters
I saw this salmon entrée as I walked by someone else’s table, but I didn’t like the presentation of the entrée itself. I sent a humble request back to the chef, via my waitress and asked him to really style up the plate so that I could photograph it. You know what? He did. He even came out to meet me and see what I was up to. He thanked me for caring about how the entrée looked on the plate and was grateful for my interest. Styling isn’t just for hipsters.


Share Only Your Best
Please, if you are an active foodie photographer, spare showing us every meal you ever eat. Share only your best and most flattering food shots. Keep the bulk of your foodie photos to yourself as memory keepsakes.

Minimize Filters
I hardly ever put Instagram filters (or any photo app filters) on my food shots because it mostly looks unnatural. The goal of foodie photographs is to make the food shots as natural, attractive and appetizing as possible. Keep it real. Minimize filters.

Backlight Your Food
If you browse professional food magazines and blogs, you will notice that a lot of food is ‘backlit’. In other words, the light is coming from behind (and not in front of the food). This makes the composition fresh and airy. It also adds a bit of stylistic modernity to the final shot. I shot this salad using a simple backlight technique, and then I shot another one with side lighting as well as top lighting. Which one do you like?


Give Food an Environment
Sometimes all it takes to elevate your photos is just a hint of the environment, just like we’ve done here with this simple bowl of tortilla soup.

Primary and Secondary Elements
All photographs have what they call ‘primary’ and ‘secondary’ visual elements. Art critics call this ‘weight’. The trick here is to get the viewer to focus on the primary element and use the secondary elements to frame the composition.


No Fuss. No Muss.
For those of you new to photography, these tips may seem a bit too much as well as time consuming. You might be thinking that to shoot great foodie photography it will completely interrupt your eating experience. I am here to tell you that this is not true! Most of what I’m showing you here can be done, and done well, in less than a minute. When I shoot food, my motto is: No fuss, no muss. I don’t want to bring attention to what I’m doing or to myself. I want to get in and get out and make my food photograph only a tiny part of my dining experience.

Secret Sauce is Love
If you love food like I do, then it will show up in your food photography. Passion always trumps product in the kitchen as well as behind the lens. Bon appetit!

Featured Posts
-
 Camera+ 10 arrives with full depth support, HEIF, accurate viewfinder and smiles!
by Pedro Cuenca
Camera+ 10 arrives with full depth support, HEIF, accurate viewfinder and smiles!
by Pedro Cuenca
-
 A Beginners Guide for Manual Controls in iPhone Photography: ISO
by Jack Hollingsworth
A Beginners Guide for Manual Controls in iPhone Photography: ISO
by Jack Hollingsworth
-
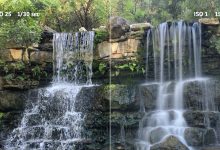 A Beginners Guide for Manual Controls in iPhone Photography: Shutter Speed
by Jack Hollingsworth
A Beginners Guide for Manual Controls in iPhone Photography: Shutter Speed
by Jack Hollingsworth
-
 How To Shoot Close-Up and Macro Photography With Your iPhone
by Jack Hollingsworth
How To Shoot Close-Up and Macro Photography With Your iPhone
by Jack Hollingsworth